
close
Choose Your Site
Global
Social Media


Views: 0 Author: Site Editor Publish Time: 2026-08-20 Origin: Site


Unmapped winter boundaries lead to destroyed landscaping, damaged sprinkler heads, and broken snow removal equipment. Once heavy snow accumulates, visual cues for property lines, ditches, and hardscaping completely disappear. Property owners and snow removal contractors require a reliable, highly visible, and resilient physical barrier system to navigate safely. Deploying fiberglass driveway markers serves as the industry-standard solution for winter delineation. We rely on these rods to establish clear perimeters before the ground freezes. This guide objectively evaluates fiberglass against alternative materials based on field performance. You will discover optimal use cases and gain a technical framework for installation and procurement. We will explore how these markers prevent property damage and streamline plowing operations in deep snow conditions. Proper deployment eliminates the guesswork for plow operators and protects hidden infrastructure from heavy steel blades.
Primary Function: Fiberglass driveway markers act as flexible, high-visibility guides that prevent property damage and streamline snow plowing operations in deep snow conditions.
Material Superiority: Pultruded fiberglass offers a superior balance of flexibility and ground-lock stability compared to traditional wood stakes, though it requires specific handling to prevent splintering.
Visibility & Height Requirements: Integrating a Reflective Driveway Marker design is critical for low-light environments, while selecting the correct height (typically 48 to 72 inches) ensures visibility in deep snow accumulation.
Implementation Strategy: Successful deployment relies on correct diameter selection (typically 1/4" to 5/16"), strategic spacing based on terrain curves, and proper installation depth to withstand plow force and frost heave.
Winter boundary management relies on high visibility, property damage prevention, and operational speed. When snow blankets a property, the landscape transforms into a uniform white sheet. Equipment operators lose their spatial awareness immediately. Physical markers restore this awareness by creating a clear visual map of the terrain. We use them to define the exact limits of safe operation.
The primary function involves mapping the exact transition between pavement and softscaping. Paved asphalt or concrete surfaces often blend seamlessly into adjacent lawns under snow cover. Markers define this hidden border. They create a visual runway for residential vehicles and commercial plows. Clear boundaries streamline snow removal because operators can push snow right to the edge without guessing. They maintain momentum. This efficiency prevents vehicles from sliding off paved surfaces into soft, muddy shoulders or tearing up dormant sod.
Snow plows wield immense destructive power. A heavy steel blade on a skid steer easily destroys hidden property features. Markers act as a defensive shield. They protect dormant garden beds from being uprooted. They highlight the location of low retaining walls and decorative boulders. Hidden sprinkler systems and irrigation valve boxes remain safe from crushing weight. Placing markers around these vulnerable areas creates a strict exclusion zone. Plow drivers know exactly where to stop pushing. This physical barrier prevents extensive spring repair work.
Contractors often navigate unfamiliar properties in the dark during early morning shifts. This creates significant operational friction. Markers reduce liability for these operators by providing a standardized navigation system across different sites. Furthermore, fiberglass provides physical feedback. When a plow wing gets too close to an edge, the marker flexes against the blade or vehicle body. The driver sees this movement in their mirrors. They can immediately adjust their steering. This real-time feedback loop prevents turf damage and keeps the heavy equipment on solid ground.
Heavy snowfall conceals dangerous terrain features. Culverts become invisible traps for plow wheels. Deep drainage ditches look like solid, level ground. Drop-offs vanish under snowdrifts. Fire hydrants disappear entirely, creating severe safety risks for emergency responders. Markers highlight these critical hazards. Placing a tall, brightly colored rod next to a culvert warns drivers to steer clear. Marking fire hydrants ensures fire departments can locate them instantly. This hazard identification prevents vehicle damage and enhances overall site safety.
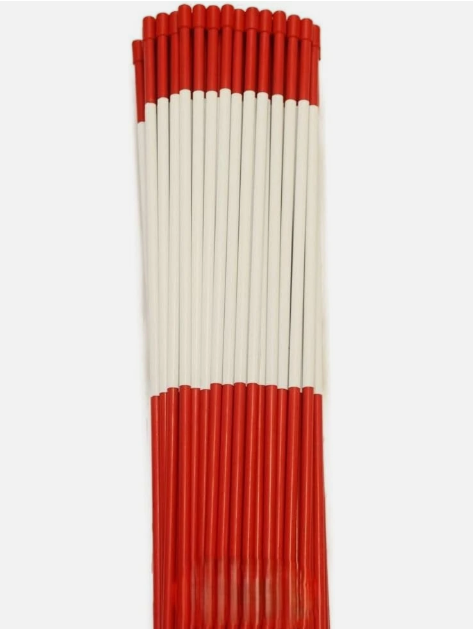
Evaluating boundary materials requires looking at cold-weather performance and impact resistance. Winter environments subject materials to extreme stress. Freezing temperatures alter structural integrity. Plow strikes deliver massive kinetic energy. The chosen material must withstand these forces consistently without failing.
Wood stakes represent the traditional, legacy approach to boundary marking. However, they fail frequently under winter conditions. Flexibility remains the primary differentiator. Fiberglass bends under the force of pushed snow. It flexes during minor plow contact. Wood simply splinters and snaps. Once wood breaks, it leaves a jagged, frozen stump hidden just below the snow surface. This broken stake can puncture tires or cause tripping hazards.
Ground lock stability also favors fiberglass. Pultruded rods feature a uniform, narrow profile. This shape locks into frozen ground securely. Wood stakes often loosen as moisture freezes and thaws around them, pushing them out of the soil through frost heave. Longevity further separates the two materials. Fiberglass resists rot and moisture penetration. Wood degrades rapidly. It absorbs water, swells, and rots after a single season of moisture exposure. You must replace wood stakes annually, whereas fiberglass lasts for multiple seasons.
Polymer and plastic markers offer another alternative. Manufacturers often claim proprietary plastic blends outperform standard materials. We must analyze cold-weather brittleness. Standard fiberglass can snap under extreme pressure, such as a direct, misplaced push from a heavy plow blade. Some claim specialized polymers survive these direct hits better.
However, memory retention physics heavily favor pultruded fiberglass. Memory retention refers to a material returning to a straight vertical position after an impact. Fiberglass excels here. It absorbs glancing impacts and snaps back perfectly straight. Many plastics permanently deform. They crease or bend permanently after a strike, leaving the property looking unkempt. You must balance the specialized material properties of polymers against the proven, highly reliable track record of fiberglass. Fiberglass remains the industry standard because it offers the most consistent performance across varied winter conditions.
Material Performance Comparison for Winter Boundary Delineation
Material Type | Flexibility | Ground Lock Stability | Cold-Weather Performance | Memory Retention |
|---|---|---|---|---|
Pultruded Fiberglass | High (Bends under pressure) | Excellent (Narrow profile locks in) | Stable (Resists freezing) | Superior (Snaps back straight) |
Traditional Wood | Low (Splinters and snaps) | Poor (Loosens with frost heave) | Poor (Absorbs moisture and rots) | None (Breaks upon impact) |
Polymer/Plastic | Moderate (Varies by blend) | Good | Prone to brittleness at -20F | Poor (Creases permanently) |
Selecting the correct marker requires understanding specific manufacturing features. Not all rods perform equally in the field. You must match the physical specifications to your exact environmental needs and equipment types.
Quality markers utilize the pultrusion manufacturing process. Pultrusion pulls continuous fiberglass rovings through a resin bath. The material then passes through a heated die. This creates a rod with exceptional longitudinal tensile strength. The glass fibers align perfectly along the length of the rod. This alignment provides the characteristic flexibility and snap-back memory required to survive plow strikes.
Matching the diameter to the application dictates success. A 1/4-inch diameter serves as the standard for residential use. It offers excellent flexibility for hand-shoveled areas or light snow blower use. Commercial plow routes demand thicker profiles. You should select 5/16-inch or 3/8-inch diameters for heavy-duty applications. These thicker rods resist the massive weight of heavy, wet snow pushed by truck-mounted V-plows. They remain rigid enough to stand tall in blizzards while retaining necessary flex.
Diameter Selection Guide
Rod Diameter | Primary Application | Equipment Exposure | Rigidity Level |
|---|---|---|---|
1/4 Inch | Residential driveways, walkways | Snow blowers, hand shovels | High flex, low rigidity |
5/16 Inch | Commercial lots, long driveways | Pickup truck plows, skid steers | Balanced flex and rigidity |
3/8 Inch | Municipal roads, heavy industrial | Heavy loaders, municipal plows | High rigidity, low flex |
Height determines visibility. Standard snowfall regions typically utilize 48-inch markers. This height accommodates typical residential and commercial applications. It stands above normal accumulation while remaining easy to install without a ladder or step stool.
Regions prone to heavy accumulation require different specifications. Deep snow and massive drifts quickly bury 48-inch stakes. You must upgrade to 60-inch or 72-inch markers in these environments. The extra length ensures the tip remains visible even after multiple major winter storms. Calculate your average maximum snow depth before selecting a length to ensure the marker extends at least 12 inches above the highest expected snowpack.
Visibility dictates the need for reflective tape. You must mandate a Reflective Driveway Marker in specific scenarios. Curved driveways, commercial parking lots, and areas with minimal street lighting require them. Heavy white-out conditions also necessitate reflectivity. The engineering-grade tape catches vehicle headlights, illuminating the boundary in total darkness.
You can use non-reflective markers exclusively for daylight-only, easily visible straightaways to save on procurement. If you choose reflective models, evaluate the tape quality. Look for 360-degree visibility. The tape must wrap entirely around the rod. Furthermore, the adhesive must withstand freezing temperatures. Poor-quality tape peels off during the first freeze-thaw cycle, rendering the marker invisible at night.
Sunlight degrades unprotected fiberglass. UV rays break down the surface resin over time. This degradation leads to a micro-splintering effect. The rod becomes fuzzy and sheds tiny glass fibers. Handling a degraded rod causes painful skin irritation. UV coatings prevent this breakdown. High-quality markers feature a protective UV layer integrated into the resin. This coating ensures the rod remains smooth and safe to handle over multiple seasons.
The ends of the rod dictate installation ease and durability. Look for pointed tips at the bottom. A sharpened tip penetrates dense, frozen soil much easier than a flat cut. It slices through roots and compacted gravel base.
The top of the rod requires a protective cap. Installation often involves striking the top of the marker with a rubber mallet. Hitting raw fiberglass causes it to fray and split. A heavy-duty polymer cap absorbs the impact. It prevents the fiberglass from splintering during installation, extending the usable life of the rod.
Proper installation guarantees performance. Haphazard placement leads to failed boundaries and damaged property. You must follow a strict framework for spacing and ground penetration to ensure the markers survive the winter.
Handling fiberglass carries physical risks. You must address the danger of splinters. Always wear heavy-duty leather gloves during installation and removal. Never slide bare hands along the shaft. Bending rods excessively during insertion poses another risk. Forcing a rod into hard ground can cause it to snap under tension. Use proper tools rather than brute force to seat the markers.
Strategic spacing creates a continuous visual line. On straightaways, space markers every 10 to 15 feet. This distance provides adequate guidance without cluttering the landscape. Curves and hazards require a different approach. Condense the spacing to every 3 to 5 feet around corners. This tight grouping clearly defines the turning radius. It prevents plows from cutting corners and destroying turf. Circle hazards like fire hydrants or culverts with three to four closely spaced rods.
Stability relies on proper depth. Target a minimum depth of 4 to 6 inches. This depth ensures stability against high winds and heavy snow loads. It anchors the rod securely without sacrificing too much above-ground visibility. Pushing it deeper wastes valuable height. Leaving it shallower risks the rod blowing over during a storm.
Timing matters immensely. Install markers before the ground fully freezes. Late fall provides the optimal window. The soil remains pliable enough for easy insertion. Once the frost line sets in, installation becomes significantly more difficult and requires power tools.
Frozen or compacted ground requires specialized tactics. Never hammer a fiberglass rod directly into frozen earth. Instead, use pilot hole tools. A specialized steel spike works perfectly. Drive the steel spike into the ground, remove it, and slide the fiberglass rod into the resulting hole. Alternatively, use a cordless drill with a long masonry bit. Drill a 6-inch deep hole and drop the marker in. These methods prep the ground and protect the fiberglass from structural damage during installation.
Standard Installation Workflow
Survey the property and identify all hardscaping, drop-offs, and turf transitions.
Mark the spacing intervals using a measuring tape or measuring wheel.
Create pilot holes 4 to 6 inches deep using a steel spike or masonry drill bit.
Insert the pointed end of the fiberglass rod into the pilot hole.
Tap the polymer cap gently with a rubber mallet to seat the rod firmly in the soil.
Verify the rod stands perfectly vertical and adjust the surrounding soil if necessary.
Managing winter boundaries across large properties requires logistical planning. You must understand volume requirements and lifespan expectations to maintain effective delineation year after year without running out of inventory mid-season.
Calculate your volume needs accurately. Measure the total linear footage of the boundaries requiring marking. Divide this by your chosen spacing interval. Residential properties typically require smaller volumes. Buying in packs of 10 or 20 usually covers a standard driveway and garden beds. Commercial contractors manage massive portfolios. They require bulk cases of 100 or more units. Planning your volume requirements early ensures you always have inventory on hand for mid-season replacements when markers inevitably get damaged.
Fiberglass resists rot, but it is not indestructible. You must factor in an annual attrition rate. Expect to lose 10 to 15 percent of your inventory each season. Budget for markers lost to severe, direct plow strikes. Heavy machinery will occasionally snap a rod if the operator makes a major error. Theft and extreme weather events also contribute to unit loss. Plan your procurement to cover these expected losses.
Storage best practices maximize multi-year longevity. Remove markers in the early spring before lawn mowing begins. Wipe them down with a damp cloth to remove road salt and grime. Store them flat in a dry, dark place. Keeping them out of direct summer sunlight preserves the UV coating and prevents premature resin degradation.
Fiberglass driveway markers remain the most balanced solution for winter boundary marking. They offer superior flexibility and visibility compared to traditional wood. Their pultruded construction ensures they lock into the ground securely and snap back after glancing plow strikes. They provide a highly scalable, reliable method for protecting property and guiding snow removal operations.
When selecting your inventory, follow strict shortlisting logic. Recommend 48-inch, 1/4-inch non-reflective markers for basic, well-lit residential straightaways. Upgrade to taller 5/16-inch reflective models for commercial contractors, curved paths, and deep-snow regions.
Take the following steps to secure your property:
Measure your property perimeter and identify all hidden hazards before the first snow.
Calculate the required unit count based on the 10-15 foot straightaway and 3-5 foot curve spacing framework.
Procure the appropriate diameter and height markers based on your regional snowfall averages and equipment types.
Install the markers 4 to 6 inches deep using pilot holes before the first hard freeze sets into the soil.
Remove, clean, and store the markers flat in a dark environment at the end of the season.
A: Yes, they can break under specific conditions. While highly flexible, direct, high-speed hits from heavy plow blades can snap them. However, they survive glancing blows and pushed snow far better than wood stakes, which splinter easily upon any impact.
A: You should install them 4 to 6 inches deep. This depth provides optimal stability against wind and snow loads without losing too much above-ground height. Pushing them deeper wastes visibility, while shallower installation risks them blowing over.
A: Yes, they are frequently repurposed in the spring and summer as durable, rot-proof plant supports. They are safe for soil, but you should always handle them with heavy leather gloves to avoid micro-splinters from UV degradation.
A: The 5/16-inch diameter offers increased rigidity and durability. It withstands heavy snow loads and commercial plowing forces better. The 1/4-inch diameter serves as the standard for typical residential use and hand-shoveled areas.
A: Use a masonry drill bit or a specialized steel pilot-hole tool. Drill or punch a hole first, then insert the rod. Forcing the fiberglass rod directly into frozen ground can cause it to splinter or snap under the tension.
A: Reflective tape catches vehicle headlights. This makes boundaries highly visible at night, in poorly lit areas, or during heavy white-out snow conditions. It prevents vehicles from driving off the pavement when natural visibility drops to zero.
A: The 48-inch height is standard for most applications. However, 60 to 72 inches is recommended for areas that experience deep snowdrifts to ensure the markers remain visible above the maximum expected winter accumulation.
