close
Choose Your Site
Global
Social Media


Views: 0 Author: Site Editor Publish Time: 2026-06-08 Origin: Site


Replacing cracked composites often brings high material costs. It also causes significant operational downtime. When a critical structural or fluid-transport cylinder fails, waiting for a replacement part can halt projects entirely.
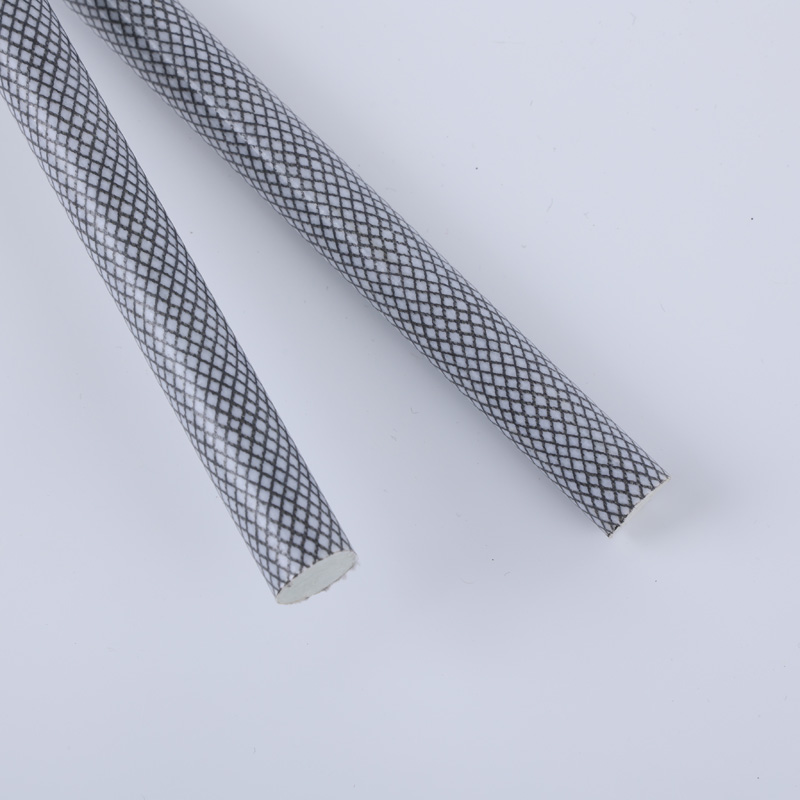
Flat surface patches differ drastically from fixing a cylindrical Fiberglass Tube. Cylinders require specific tension-wrapping techniques. You must restore their load-bearing integrity to prevent future delamination. Poorly executed patches often bulge. They can trap air or fail completely under pressure.
A successful Fiberglass Tube Repair demands proper damage evaluation. You must select the right epoxy resin and perform exact surface preparation. This guide explains how to identify repairable damage. You will learn to choose optimal materials and apply professional-grade tension wraps to restore full structural functionality.
Assess Structural Integrity: Not all fiberglass tubes can be safely repaired; high-pressure or critical load-bearing tubes with extensive crush damage often require replacement.
Resin Selection is Critical: Epoxy resin significantly outperforms polyester resin in secondary bonding strength for structural tube repairs.
Preparation is 90% of the Work: Taper-sanding (scarfing) the damaged area is mandatory to ensure the new fiberglass wrap bonds flush and maintains the tube's outer diameter.
Tension Wrapping: Applying fiberglass fabric tightly around the cylindrical shape is essential to eliminate air voids and ensure a watertight, structurally sound cure.
Before mixing any resin, you must evaluate the failure type. Some damage scenarios allow for easy patches. Others demand immediate component replacement. We categorize structural damage into three distinct failure types. Each requires a different approach.
First, identify hairline cracks. These usually stem from flexural fatigue. Small cracks often accept a simple overwrap repair. Second, look for localized punctures. Screw holes or minor impact divots fall into this category. They are highly repairable. Finally, assess the tube for structural crush damage. If the core matrix is shattered, the structural integrity is gone. Crush damage usually dictates a full replacement.
We must make transparent assumptions about pressure and load. Does the tube hold high-pressure fluids? Does it support human life or heavy structural loads? If you answer yes to these questions, proceed with extreme caution. An engineer should evaluate the compromised part. They must confirm if a composite patch complies with local safety standards. Low-pressure water pipes or antenna masts pose much lower risks.
You should calculate a cost-to-benefit ratio. Compare the immediate downtime against lead times for new parts. A repair kit costs very little. Ordering a specialized replacement tube can take weeks. If downtime costs your business thousands of dollars a day, an emergency structural patch becomes highly beneficial.
Damage Assessment Criteria Checklist | |||
Failure Type | Severity | Recommended Action | Engineering Consult Needed? |
|---|---|---|---|
Stripped Screw Hole | Low | Inject thickened epoxy filler. | No |
Hairline Fatigue Crack | Moderate | Scarf and tension-wrap. | No (for low-load applications) |
Impact Puncture (<1 inch) | Moderate | Scarf, fill, and tension-wrap. | Depends on system pressure |
Severe Crush/Delamination | High | Replace component. | Yes |
Always inspect the inner wall of the tube if accessible. External cracks often hide extensive internal delamination. Use a flashlight to check for shadowing inside the cylinder.
Material selection dictates the success of your project. Many people grab the first resin they find at a hardware store. This leads to weak bonds and eventual part failure.
We always recommend epoxy resin for structural patches. Epoxy stands as the industry standard. It boasts higher tensile strength and superior adhesion to cured composites. Polyester resin shrinks up to 3% during the curing phase. This shrinkage pulls the patch away from the original substrate. Epoxy features almost zero shrinkage. It creates a powerful mechanical and chemical bond.
Polyester is cheaper. However, it requires a primary chemical bond to achieve maximum strength. Since you are applying a patch over fully cured material, you rely entirely on secondary bonding. Epoxy outperforms polyester significantly in secondary bonding scenarios.
The type of fiberglass material you choose matters just as much as the resin.
Woven Fabric (Cloth): This is the best choice for wrapping cylinders. Woven cloth contours well around curved surfaces. It offers uniform strength. It also leaves a much smoother finish. A 6-ounce plain or twill weave works perfectly for small diameters.
Chopped Strand Mat (CSM): Avoid using CSM for tight cylindrical shapes. CSM consists of short glass fibers held together by a styrene-soluble binder. Epoxy resin lacks styrene. Therefore, the binder will not dissolve. The mat remains stiff and refuses to wrap tightly around small diameters.
You cannot perform this work safely without specific tools. Gather the following non-negotiable items:
Nitrile Gloves: Protect your skin from chemical sensitization.
Respirators: Wear an N95 or P100 mask. Sanding glass fibers produces hazardous dust.
Variable-Speed Sanders: An orbital sander speeds up the tapering process.
Graduated Mixing Cups: You need precise chemical ratios. Never guess the measurements.
Executing a structural patch requires methodical precision. Do not rush these steps. Proper technique prevents air entrapment and ensures flush integration.
Preparation dictates the lifespan of your patch. Begin by degreasing the damaged area completely. Use acetone or isopropyl alcohol. Clean the surface before you start sanding. If you sand a dirty surface, you push oils and contaminants deep into the composite pores. This ruins the epoxy bond.
Next, you must taper the edges. Professionals call this "scarfing." Sand a 12-to-1 bevel around the crack or hole. If the tube wall is 1/8-inch thick, your sanded taper should extend 1.5 inches outward in every direction. This gradual slope creates massive surface area. The new resin grips this roughened slope. Scarfing also prevents the final repair from bulging past the original outer diameter.
Common Mistake: Do not just scuff the surface and apply a patch over the top. A raised patch creates stress risers. It also interferes with mounting brackets.
Precision matters deeply during this phase. Avoid the "eyeballing" approach at all costs. Epoxy requires exact volumetric or weight ratios. Some kits use a 1:1 ratio. Others use a 5:1 ratio. Read the manufacturer instructions carefully.
Altering these ratios does not speed up the curing time. It ruins the structural integrity entirely. Unreacted resin remains sticky forever. Unreacted hardener makes the patch brittle.
Pay attention to your working time, known as "pot life." Ambient temperature heavily affects the exothermic reaction. Warmer temperatures accelerate the chemical process. This limits your application time. If you mix a large batch in a deep cup on a hot day, it may start smoking and harden in minutes. Pour mixed epoxy into a wide, shallow pan to dissipate the heat.
Application technique separates amateur patches from professional restorations. First, apply a thin base coat of mixed resin directly onto the scarfed area. This primes the surface.
Next, begin wrapping the woven fiberglass fabric under tension. Pull it tightly around the cylinder. Use a disposable brush or a plastic squeegee to "wet out" the material. Press the resin into the fabric until the white fibers turn completely transparent. Transparent glass means the fibers are fully saturated.
Emphasize air void removal. Trapped air bubbles act as structural weak points. In a cylindrical application, air likes to pool under the initial layers. Use a squeegee to firmly push air bubbles out toward the edges of the fabric.
You do not always need a full fabric wrap. For micro-punctures or stripped screw holes, use a different technique. Mix your epoxy. Then, stir in high-density structural fillers (like colloidal silica). Create a paste with a peanut butter consistency. Inject this thickened epoxy directly into the hole. Let it cure. You will achieve a clean, nearly invisible fix. You can re-drill and tap this filled hole later.
Patience plays a vital role here. Provide realistic expectations for full chemical curing. An epoxy patch may feel "dry to the touch" within six hours. However, a full structural cross-linking cure usually takes 24 to 72 hours at room temperature. Do not put the system under pressure too early.
Once fully cured, restore the profile. Use an orbital sander with 120-grit paper. Sand the patch flush with the surrounding geometry. Work slowly to avoid sanding through your new fibers. Switch to 220-grit paper for a smooth finish.
Finally, address UV protection. Epoxy degrades heavily under ultraviolet light. It will turn yellow and chalky if left exposed. You must mandate a topcoat for outdoor applications. Apply a UV-resistant marine paint, a polyurethane clear coat, or a matching gel coat to seal the work.
Understanding why composites fail helps you extend the lifespan of your equipment. Several primary factors compromise structural integrity over time.
Flexural Fatigue: Cylinders often undergo repeated bending. If the bending exceeds the designed modulus of elasticity, micro-cracks form. Over time, these micro-cracks connect and cause large-scale fractures. Avoid overloading the system.
Impact Damage: Blunt force causes localized delamination. A dropped tool or a collision shatters the resin matrix. The glass fibers may look intact, but the rigid support structure is gone. Install rubberized bumpers in high-traffic zones.
Environmental Degradation: Prolonged UV exposure destroys unprotected resins. Chemical corrosion from harsh solvents also weakens the matrix. Ensure protective topcoats remain intact.
We highly recommend regular visual inspections. Look closely for micro-cracking around joints and mounting points. Apply fresh protective coatings every few years. Catching small spider-cracks early prevents massive structural failures later.
Routine Maintenance Schedule for Composite Structures | ||
Maintenance Task | Frequency | Key Focus Areas |
|---|---|---|
Visual Surface Inspection | Monthly | Look for chalking, discoloration, or spider cracks. |
Joint and Fastener Check | Quarterly | Inspect screw holes for elongation or stress lines. |
UV Topcoat Reapplication | Every 2-3 Years | Sand lightly and apply polyurethane or marine paint. |
Executing a durable restoration requires an understanding of composite mechanics. A successful repair relies entirely on proper epoxy-based adhesion. You must commit to accurate scarfing. Without a proper bevel, the patch will peel away. Tight tension wrapping eliminates dangerous air voids.
Your next steps are clear. Evaluate your specific damage scenario carefully. Determine if the component handles extreme loads or pressures. If it is safe to proceed, select a high-grade epoxy kit and woven fiberglass cloth. Follow the precise mixing and scarfing rules outlined above. For critical load-bearing applications, always consult a composite engineer before attempting a patch.
A: No. Polyester resin will not bond effectively to cured epoxy. The chemical structures are incompatible for strong secondary bonding. Polyester also shrinks during the curing process, pulling away from the repair site. Always use high-grade epoxy resin for structural repairs.
A: Curing depends heavily on ambient temperature. Typically, it takes 24 hours to achieve a structural cure at 70°F (21°C). However, the resin may require up to 72 hours to reach its maximum chemical strength. Colder temperatures drastically slow this process.
A: It depends on the wrap thickness and the overall repair quality. Low-pressure systems are generally safe to patch. High-pressure systems require engineered composite overwraps to prevent catastrophic blowouts. Always consult an engineer for high-pressure fluid lines.
A: Clean the hole thoroughly. Mix a small batch of epoxy and blend in structural high-density fillers until it forms a thick paste. Inject this mixture into the stripped hole. Allow it to cure completely. You can then re-drill and tap the area.
